
Introduction:
An analog clock is a clock or watch that have three moving sticks named hour’s hand, minute’s hand, and second’s hand. hour’s hand-marked from 1 to 12 and minute’s hand-marked from 1 to 60, which combinedly functioned to show the time at that instance. Some of the clocks has Roman numerals marked on them, while some of the clocks have numbers, and some other has nothing mentioned on them particularly, based on the angle of the hand we have to determine the time.
Python provides a package, matplotlib, and numpy, by which we can visualize the data easily.
Outline:
In this tutorial, we are going to know how to build an analog clock using some of the python packages like matplotlib and numpy.
for our task, we need basic knowledge about coordinate systems.
There are 4 kinds of commonly used coordinate systems in mathematics,
Cartesian coordinate system, Polar coordinate system, Cylindrical and spherical coordinate systems, Homogeneous coordinate system. In our daily life we have used the first one for most cases, the Cartesian coordinate system, where a point is taken to be the signed distances to the lines. The distances are represented by x, y and in some cases, z is also used to measure the distances in a 3D direction.
we mainly take advantage of the polar coordinate system for our analog clock mechanism with matplotlib. I wrote this section clearly because it is the essential math thought for the below code.
Project prerequisites:
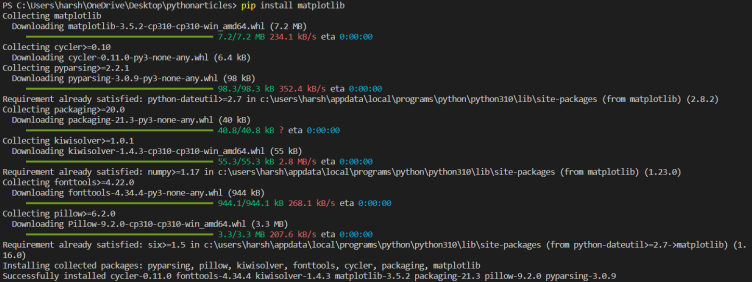
Before jumping into the main code, we should download the following packages which are used to build the analog clock. They are matplotlib and numpy.
Matplotlib package installation:
matplotlib: Matplotlib produces publication-quality figures in a variety of hardcopy formats and interactive environments across platforms. Matplotlib can be used in Python scripts, the Python and IPython shell, web application servers, and various graphical user interface toolkits.
For installation instructions and requirements, see the install documentation or installing.rst in the source.
to know more about this package, refer – matplotlib · PyPI
numpy package installation:
numpy:
It provides:
- a powerful N-dimensional array object
- sophisticated (broadcasting) functions
- tools for integrating C/C++ and Fortran code
- useful linear algebra, Fourier transform, and random number capabilities
- and much more
Besides its obvious scientific uses, NumPy can also be used as an efficient multi-dimensional container of generic data. Arbitrary data-types can be defined. This allows NumPy to seamlessly and speedily integrate with a wide variety of databases.
All NumPy wheels distributed on PyPI are BSD licensed.
to know more about this package, refer – numpy · PyPI

That’s it. We have installed the required packages to run this project.
Now, lets move to the code implementation.
Code implementation:
Let’s get started…
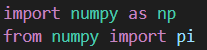
From numpy, we have imported Pi, which represents the angle of clock hands. Based on Radians to Degrees conversion, 1 Pi is 180°.
we count the time using the package matplotlib. FuncAnimation is the key to making our clock run, with which we can make an animation by repeatedly calling an update function.

When using Matplotlib’s polar plot, the default zero position for the theta axis is on the right with the angle increasing counter-clockwise. So, we need to change the default settings.
Within the update function, we clear the last plot with “plt.cla()” so that there is nothing left in the figure.
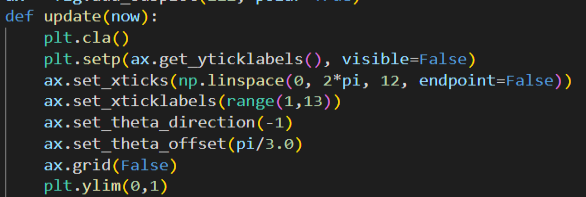
we define the axes setting every time, that sticks from 1 to 12 clockwise and 1 at the top of a clock face. And theta offset is added so that the zero position for the axis is now on the top of the clock face.
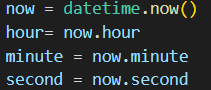
Next, we calculate the time from “datetime.datetime.now()”, by which we can get access to the present time and if needed, we can get the access to date too.
After accessing the time from your device, we can transfer time into degrees and can manage to handle the clock by handling the respective variables.
Hour-hand, minute-hand, and second-hand can be determined by the current time on the device. Lastly, return axes.
Hurray! We have completed the code implementation.
Source Code:
Here is the complete source code for the project:
from datetime import datetime
import matplotlib.pyplot as plt
import numpy as np
from numpy import pi
from matplotlib.animation import FuncAnimation
fig= plt.figure(figsize=(2.5,2.5),dpi=100)
ax = fig.add_subplot(111, polar=True)
def update(now):
    plt.cla()
    plt.setp(ax.get_yticklabels(), visible=False)
    ax.set_xticks(np.linspace(0, 2*pi, 12, endpoint=False))
    ax.set_xticklabels(range(1,13))
    ax.set_theta_direction(-1)
    ax.set_theta_offset(pi/3.0)
    ax.grid(False)
    plt.ylim(0,1)
    now = datetime.now()
    hour= now.hour
    minute = now.minute
    second = now.second
    angles_h =2*pi*hour/12+2*pi*minute/(12*60)+2*second/(12*60*60)-pi/6.0
    angles_m= 2*pi*minute/60+2*pi*second/(60*60)-pi/6.0
    angles_s =2*pi*second/60-pi/6.0
    ax.plot([angles_s,angles_s], [0,0.9], color="black", linewidth=1)
    ax.plot([angles_m,angles_m], [0,0.7], color="black", linewidth=2)
    ax.plot([angles_h,angles_h], [0,0.3], color="black", linewidth=4)
    return ax
ani = FuncAnimation(fig,update, interval = 100)
plt.show()
Let’s run this code and check the output.
Output:
You can run the source code and get a new window like this.
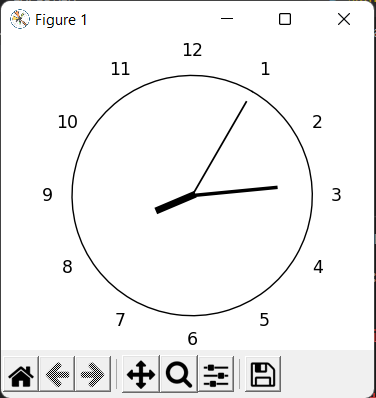
It shows the current time of your system and goes on from the moment.
Important Note:
Note: the output mentioned above is the output of the code when it is being executed, the output varies accordingly and in the output, an analog clock will be displayed like above and it continues to overwrite the output every time likewise a normal wall clock…
So, that’s it from the tutorial. Now you have learned how to build an analog clock using python through this tutorial. There are different kinds of functions available in the numpy package like color, and linewidth by which you can design the output clock according to the user’s interest. There are still a lot of things in the library that we can explore.
Happy coding!!
