

Introduction:
As you might know, sketching or creating a cartoon doesn’t always need to be done manually. Nowadays, many apps can turn your photos into cartoons. But what if I tell you, that you can create your effect with a few lines of code?
There is a library called OpenCV which provides a common infrastructure for computer vision applications and has optimized machine-learning algorithms. It can be used to recognize objects, detect, and produce high-resolution images.
Outline :
In this tutorial, I will show you how to give a cartoon effect to an image in Python by utilizing OpenCV.
To create a cartoon effect, we need to pay attention to two things; edge and color palette. Those are what make the differences between a photo and a cartoon. To adjust that two main components, there are four main steps that we will go through:
● Load image
● Create an edge mask
● Reduce the color palette
● Combine the edge mask with the colored image
Project Prerequisites :
Before jumping to the main steps, don’t forget to import the required libraries in your notebook, especially cv2 and NumPy.
Cv2: It is an open-source library that can be used to perform tasks like face detection, objection tracking, landmark detection, and much more. It supports multiple languages including python, java, c++
Numpy: numpy is a package that is used to deal with the pixels in the image which we ought to change into an animated version.


Code Implementation :
Let’s get started ..
The first thing we need to do is to import the required packages . If the packages weren’t available , then you can download the packages in your desktop.
import cv2
import numpy as np
To create a cartoon effect, we need to pay attention to two things; edge and color palette. Those are what make the differences between a photo and a cartoon. To adjust that two main components, there are four main steps that we will go through:
● Load image
● Create an edge mask
● Reduce the color palette
● Combine the edge mask with the colored image
1. Load Image :
The first main step is loading the image. To load the image, we use the function imread, to load our selective image.
img = cv2.imread("nameofimage.extension")
2. Create edge mask :
Commonly, a cartoon effect emphasizes the thickness of the edge in an image. We can detect the edge in an image by using the cv2.adaptiveThreshold() function.
we reduce the noise of the blurred grayscale image by using cv2.medianBlur. The larger blur value means fewer black noises appear in the image. And then, apply adaptiveThreshold function, and define the line size of the edge. A larger line size means the thicker edges that will be emphasized in the image.
# Edges
gray = cv2.cvtColor(img, cv2.COLOR_BGR2GRAY)
gray = cv2.medianBlur(gray, 5)
edges = cv2.adaptiveThreshold(gray, 255, cv2.ADAPTIVE_THRESH_MEAN_C,cv2.THRESH_BINARY, 9, 9)
3. Reduce the color palette :
we can reduce the noise in the image by using a bilateral filter. It would give a bit blurred and sharpness-reducing effect to the image.
# Cartoonization
color = cv2.bilateralFilter(img, 9, 250, 250)
4. Combine Edge Mask with the Colored Image :
The final step is combining the edge mask that we created earlier, with the color-processed image. To do so, use the cv2.bitwise_and function.
cartoon = cv2.bitwise_and(color, color, mask=edges)
cv2.imshow("Image", img)
cv2.imshow("edges", edges)
cv2.imshow("Cartoon", cartoon)
cv2.waitKey(0)
cv2.destroyAllWindows()
Souce Code:
import cv2
import numpy as np

# reading image
img = cv2.imread("dakota.jpg")

# Edges
gray = cv2.cvtColor(img, cv2.COLOR_BGR2GRAY)
gray = cv2.medianBlur(gray, 5)
edges = cv2.adaptiveThreshold(gray, 255, cv2.ADAPTIVE_THRESH_MEAN_C,cv2.THRESH_BINARY, 9, 9)

# Cartoonization
color = cv2.bilateralFilter(img, 9, 250, 250)
cartoon = cv2.bitwise_and(color, color, mask=edges)


cv2.imshow("Image", img)
cv2.imshow("edges", edges)
cv2.imshow("Cartoon", cartoon)
cv2.waitKey(0)
cv2.destroyAllWindows()
Now you can run the file and see the output.
Output:
Here is the Output:
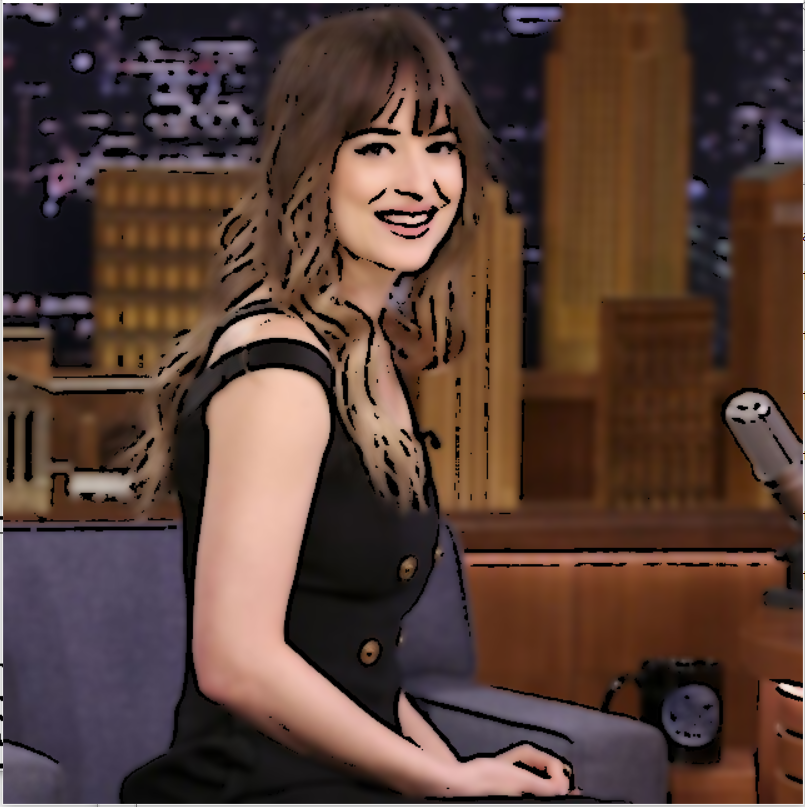
And there it is! We can see the “cartoon version” of the original photo below.
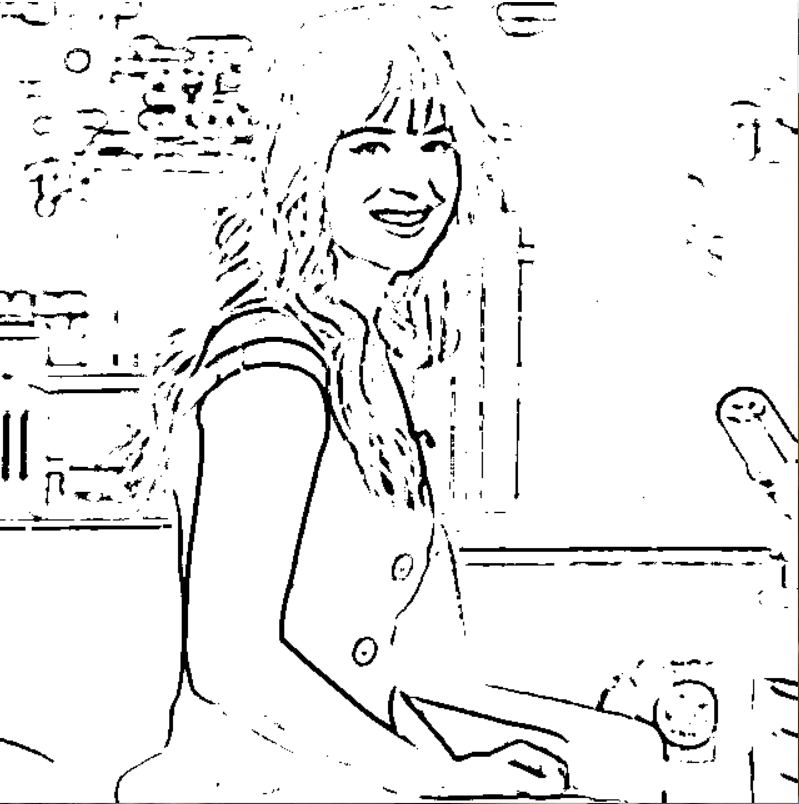
Important Note:
You can even make the pencil sketch of the original image like the following:
Now you can start playing around with the codes to create your version of the cartoon effect. Besides adjusting the value in parameters that we used above, you can also add another function from OpenCV to give special effects to your photos. There are still a lot of things in the library that we can explore. Happy trying
